Setting Up A Domain or Subdomain
Setup a domain on 1and1 Linux Hosting
This tutorial was written using a 1and1 account on Linux Hosting server. FrontPage Server Extensions are NOT installed. 1and1 allows you to host multiple domains with the Linux hosting account BUT each domain MUST point to its own folder on the server.
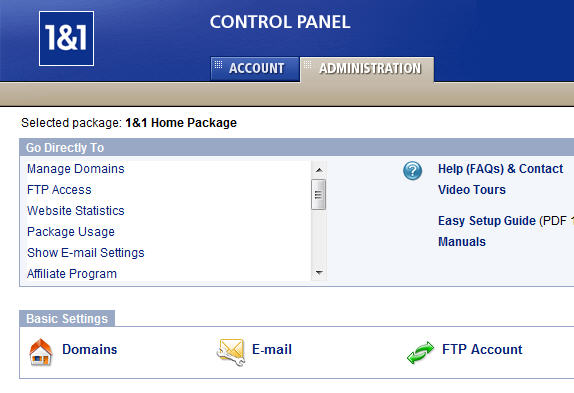
Step 1: Sign on to your 1and1 Control Panel > Select Basic Settings and Domains
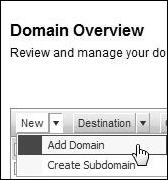
Step 2: Choose New > Add Domain
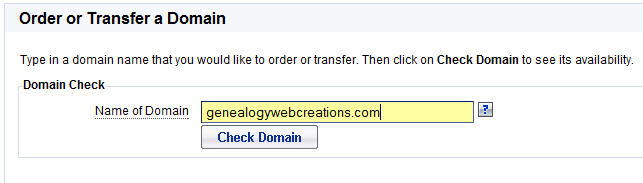
Type the name of the domain > Check Domain
You should receive a message that this domain is already registered and given the choice of transferring the registration to 1and1 OR point DNS to 1&1 name servers and keep your current registrar. Since it is wise NOT to have your domain registered and hosted by the same company, I chose to point DNS to 1and1 name servers but keep my current registrar > Next
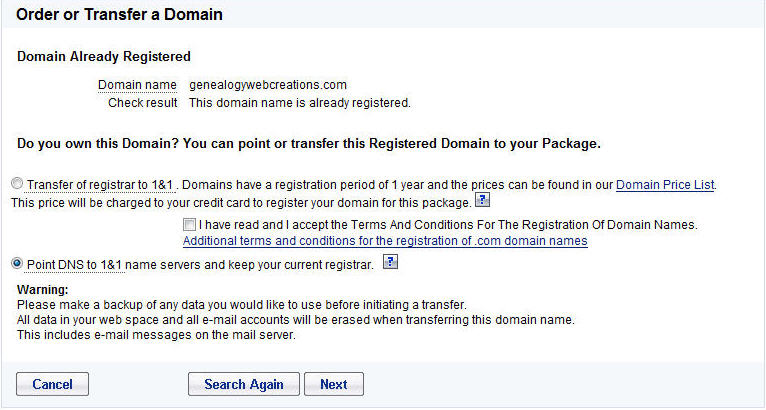
NOTE: You will receive warnings about backing up your data. If this is a new domain, you don't need to worry about that. If not and you are just moving it to a new host then YES, make sure you have a good backup.
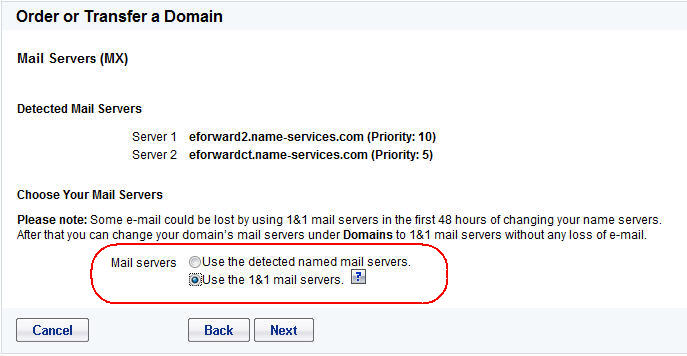
Step 3: Choose whether you want to use the 1and1 mail servers > Next
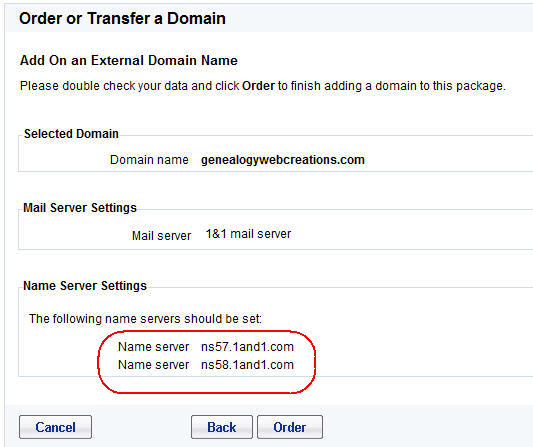
The next screen will show you your domain name, the new mail servers and you name servers. Write them down as you will need them to point your new domain to the correct server. > Click Order.
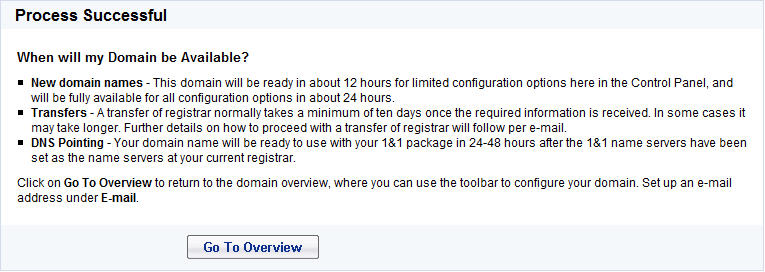
The next screen will tell you the process was successful and let you know when the new domain will be ready. > Click go to Overview.
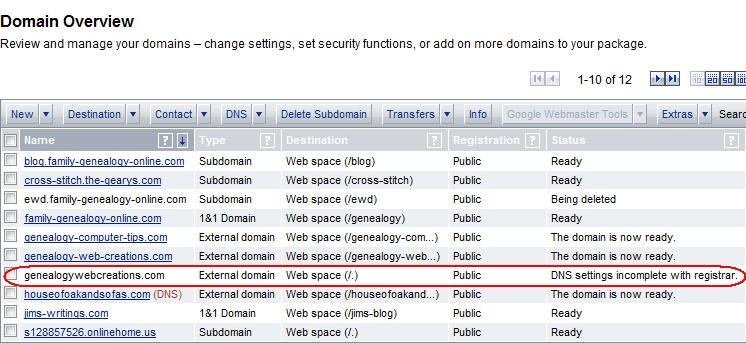
You will see your new domain listed with a notice DNS Settings incomplete with registrar.
You should receive an e-mail from 1and1 with your name server info. Keep it safe in case you need it in the future.
Pointing the domain to 1and1 Servers
Now that I have setup 1and1 to host my new domain, I need to point the domain to the correct name servers.
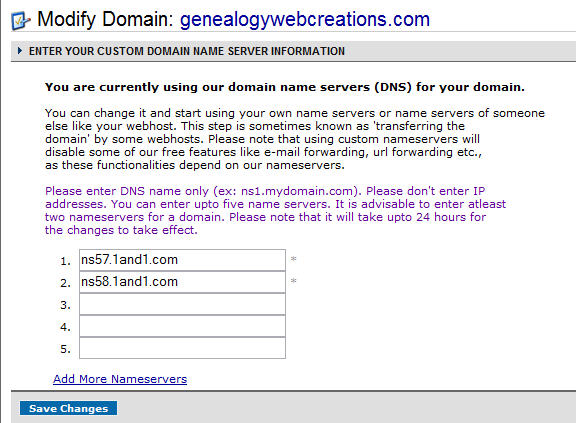
Step 1: My domains are registered with NameCheap so I sign on to my Administration panel and choose manage domains. I tick the new domain and click edit selected. Yours may be different depending on who your registrar is.
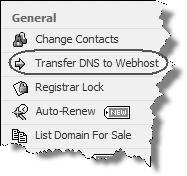
Choose Transfer DNS to Webhost > Enter the name servers provided to you > Save Changes
Step 2: Type in the url of your new domain and you should see a parking Page at 1and1. You now need to set up where on your 1and1 server space your new domain will reside.

Setting Destination Folder for Domain
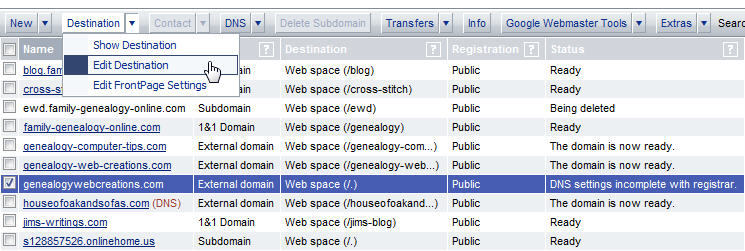
Step 1: Sign on to you 1and1 Control Panel > Select Basic Settings and Domains
Select the domain you want to work with which is currently pointing to your main root folder as the destination > Destination > Edit Destination
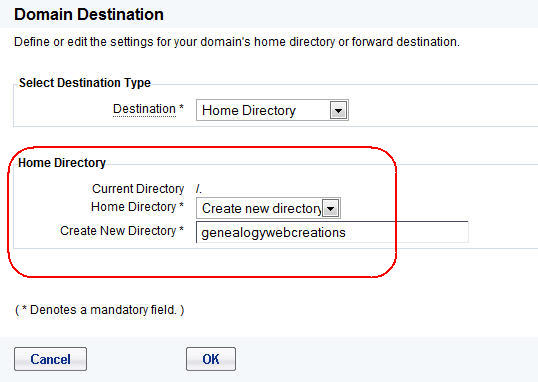
Step 2: On the Domain Destination screen choose Home Directory > Create New Directory
Type in the folder name you want to use for that domain. I tend to use the url of the domain minus the dot com. > OK > Go to Overview
You will now see the new domain pointing to its own folder. You are now ready to publish your site to your server.
The same procedure applies if you are creating a subdomain on 1and1 servers. In order to host multiple domains, EACH ONE MUST point to its own folder.
Now that your domains and/or subdomain have been set up and are pointing to their own directory, you should create a custom error page for each domain/subdomain.
Planning a Genealogy Website 2nd Edition is available as a 42 page EBook in pdf format for you to download. It has been totally revised and updated with new content. The EBook is zipped for faster download. Save it to your desktop, extract the file and it is ready to use.


April 2007 - April 2013

Disclosure: This is an affiliate link, which means that if you visit Bluehost.com through this link and purchase this product, I’ll get a commission.